Monday, September 17, 2012

Vegan Chocolate


I know I've posted about vegan cake pops with vegan chocolate but it's my gorgeous friend Sunya's birthday and nothing says Happy Birthday like chocolate and more chocolate. Now it's fair to say, I am a tad of an over achiever when it comes to baking especially when it come to making something for the first time. So with that mind set I decided on white chocolate, mint chocolate, fruit and nut and espresso! And as per usual there are certain things I learnt the hard way. I used my recipe from Gentle World, which I used last time, and the only recipe I could find for white chocolate from Bitter Sweet. Also I apologise in advance for not having photos of the making process; chocolate making is a tad tricky and there was no good time stop and document my chocolaty goodness.

Lets start with the white chocolate; super easy. I followed the instructions word for word and the only thing I can say is sift your sugar and soymilk well, I can’t stress this enough. For some reason the vegan confectionary sugar I bought was lumpy and I thought it would just dissolve in cacao butter but nope the mixture was lumpy and it took me twenty minutes to get it smooth. As the site says the end product is very sweet so I only put in a third of a cup of sugar and that seemed perfect.

 I had bought seashell chocolate moulds earlier on that day not really knowing what exactly I wanted to do with them, I wanted to do something interesting.  After about an hour of staring at them blankly my boyfriend chimes in with “why don’t you marble them like Guylian?” Genius! The white chocolate went on the bottom followed by the dark chocolate and gently swirled with a toothpick. After about six hours they popped out cleanly. Keep in mind that because the main component of the chocolate is butter the chocolate will feel a little greasy so leave it in there for a bit longer if you're unsure.


The fruit and nut was easy enough too. For these chocolates I used the same mini tart tin that I used for my mini lemon tarts. I chopped up almonds and sultanas popped it in the bottom of the pan and poured the chocolate on top.

The mint was a bit tricky. Since I couldn’t find any info about how much to put in and at what point of the making process I was pretty much flying blind. Because the coconut butter has quiet a strong aftertaste I put enough in until the mint overpowered the taste of the coconut butter. I would suggest adding the flavouring when you are thickening the chocolate so when its over cold water because I figure heating it might evaporate some of the flavour but don't quote me on this, just how my logic worked at the time. I did notice that this batch didn’t thicken as quickly which I think is due to the extra mint flavouring.

So I’ve made three batches and they’ve all turned out relatively well and I am feeling a bit overconfident and I think how hard could the espresso be? Well very! I decided to put the two recipes together because I thought the soymilk would complement the espresso well. So this is the recipe that I used:

¼ cup cacao butter
½ cup coconut butter
1 Tsp. cocoa (sifted)

1 Tsp. instant coffee
¼ Cup Confectioner’s Sugar
½ Teaspoon Soymilk Powder

a pinch of sea salt


In theory this looks right, right? Practically it turns out I learnt nothing. I combined all the dry ingredients, melted the cacao butter with the coconut butter and this is where I went wrong. I forgot how hard it was to dissolve the sugar the first time around and the instant coffee followed suite. Silly me I was under the assumption that the coffee would magically dissolve but instead it just floated there looking gross. And it kept getting worse; the chocolate wouldn’t thicken at all and I ended up having to strain the solids out and refrigerating the mixture.
 
The fruit and nut, mint and espresso were all refrigerated over night. They all came out relatively cleanly (I greased the tins with a little bit of coconut butter) except the mint. To my horror the bottom of the mint didn’t set at all and was still liquid. I suspect it has something to do with the peppermint extract I added. 
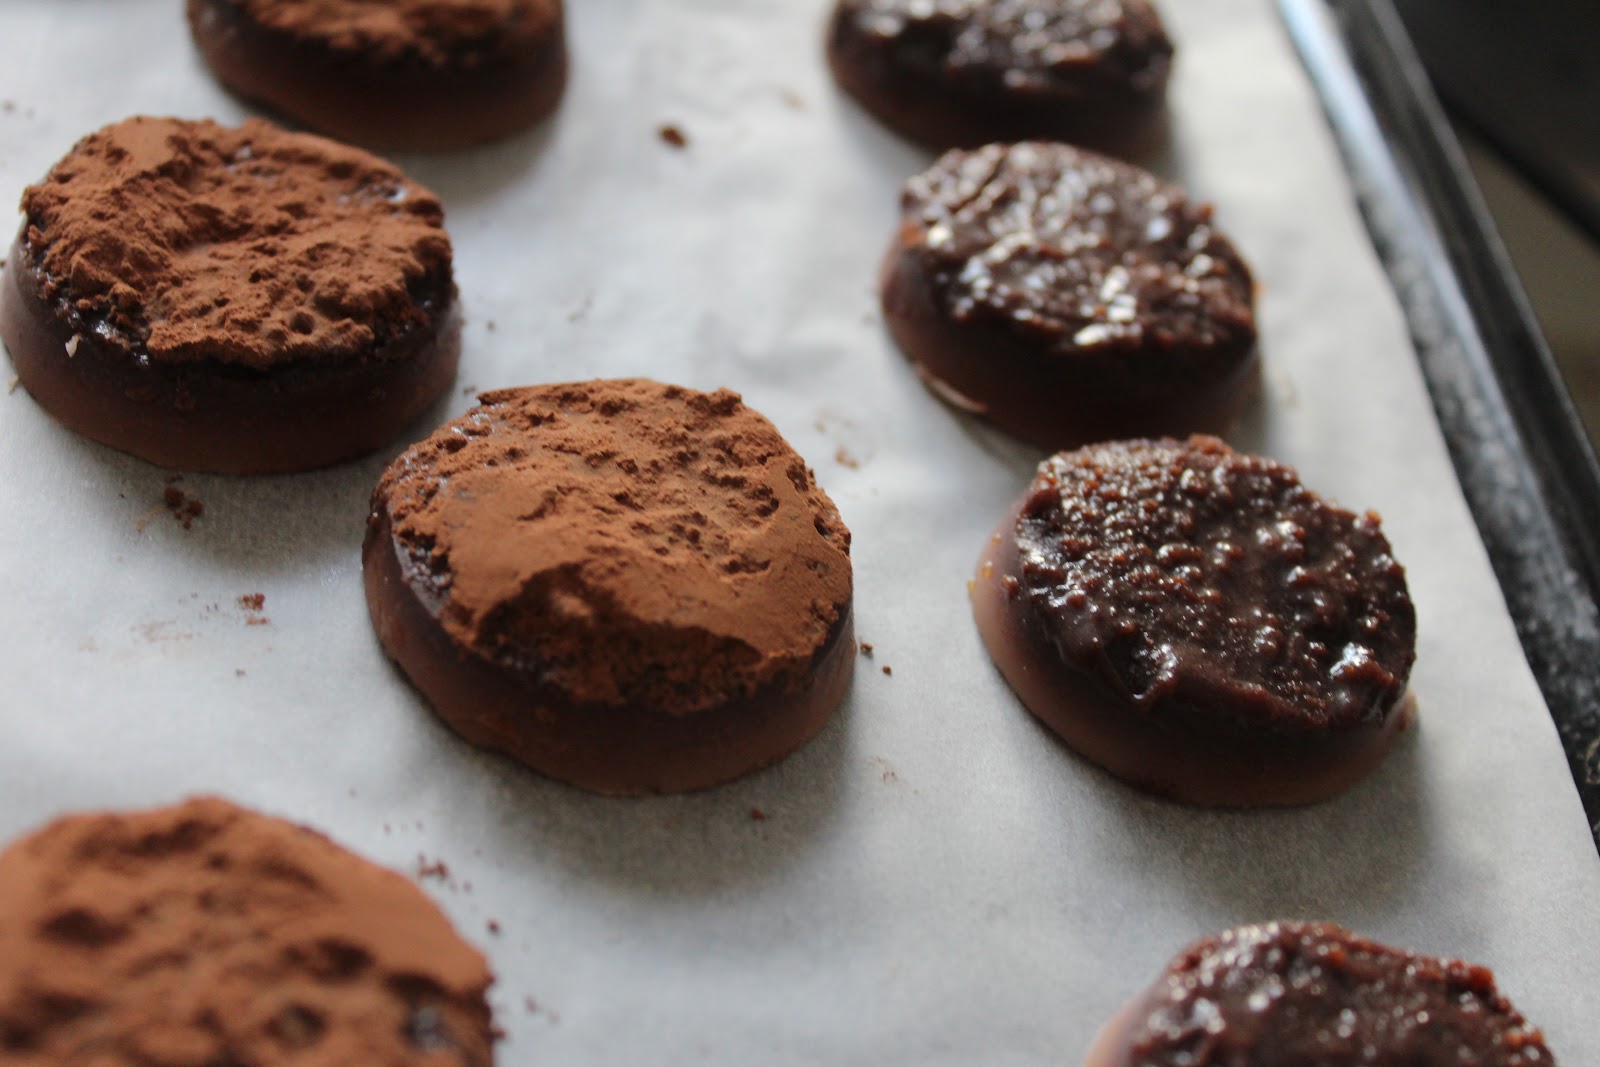
Instead of wasting an entire batch I carefully took off the excess bits that hadn’t set and dusted it with coco powder, so now it’s slightly more like fudge but still good! So here's the mint before and after;


The Fruit and Nut;
And the Espresso Hazelnut;

Because of the nature of the chocolate I individually wrapped the chocolates in foil. For the round ones I cut out round circles about four time larger then the chocolate and folded inwards and as for the shells I put a large sheet of foil in between the two chocolate moulds which helps the foil to indent the shell shapes which makes it easier to wrap.


And then my inner Martha Stewart kicked in. The candy bar labels I found on Wedding Chicks; you can customise to your liking (download and print for free!) and I the labels inspired the entire theme of the present. Then I downloaded these cute place cards templates from the Martha Stewart site and used it as the template for the cutouts for the chocolate bags. I was going for a “fifties milk bar” look!
And the finished product;

The different chocolates had individual bags and then to mixed bag just for fun!


Friday, September 14, 2012

Greens and Yellows


So after two weeks of trying to track down almond flour, my macarons were born! I used Jordan Winery's recipe, word for word, but as usual I learnt a few things the hard way. First sift the almond flour otherwise the cookies feel a bit grainy when you bite into them. Second don’t leave your egg whites to sit for too long otherwise you get this;

lumpy, goopy and unpipable mix when it should look like this.
Don’t let the cookies brown on top but having said that set your oven slightly lower then the recipe says just to be on the safe side. You’ll know the cookies are done when they come off cleanly. If the cookie takes a bit of yanking let it bake for a bit more and if the bottom of the cookie still looks moist then that’s also a sign that it needs a little bit more time in the oven. There will always be  few cookies that crack (like the ones on the right) not sure why.


 The green ones were peppermint so I filled it with chocolate ganache and the yellow ones were vanilla with lemon curd! 

Monday, September 10, 2012

Red Velvet


The only thing better then red velet cupcakes is RED VELVET CAKEPOPS!

Thursday, August 9, 2012

Tarty Tarts

My new obsession is French Macarons, they are so decadent, colourful and so so good. So how did I end up making tarts you ask? After hours of researching I found pastry chef Joanne Chang’s classic French Macarons. Long story short I made the fillings, lemon curd and chocolate ganache, then realised that my local supermarket didn’t stock almond flour and therefore I couldn’t make the macaron cookie itself! Trust me not to think these through but it occurred to me that I could use the fillings for tarts. So macarons to come but here are my tarts.


For the ganache I used the recipe from my earlier post, birthday banana cake and for the lemon curd I followed Joanne Chang’s curd recipe word for word. It’s the perfect curd; it’s sweet but not too sweet with the right amount of fresh lemon zest. Just a word of warning when you put the curd back on the stove be very careful as it thickens very quickly and you don’t want to over cook.


As for the tart base I put together a few different recipes until I got the dough consistency that I liked. For the dough:

1 1/4 cups all-purpose flour

1/4 cup unsweetened cocoa powder

1/4 cup sugar

1/4 teaspoon salt

1/2 cup cold unsalted butter, cut into small pieces

1 large egg yolk

Sift the dry ingredients and combine. Many recipes say to use a food processor for this step but since I don’t have one I just used my freestanding mixer, combine the butter piece by piece until the butter break down into small pea size bits. This next bit needs 4-5 tablespoons of cold water to combine the mix. Add and combine the water one tablespoon at a time so the dough doesn’t get too sticky! Knead and gather with your hands and the dough should resemble play dough when you’re done. Once combined wrap in glad wrap and chill for a minimum of half an hour. Once chilled lightly flour your work surface and roll out the dough. Just a tip; the dough rises a bit in the oven so roll out the dough a tad thinner than usual so it doesn’t rise as much as mine did. I used metal measuring cups to cut out the dough and place into a greased tin.


Pat down the dough lightly so it shapes to the tin and poke tiny holes in the bottom with a fork to avoid rising. Then chill the dough again for about 30min because I read somewhere that when you chill the dough in the shape you want it tends to retain shape better and you know what its true! Because I am me and was totally paranoid that they would burn, I baked them in a 170 degrees Celsius preheated oven. Baking time varies obviously depending on your oven but bake until the bottoms of your tart shells are browned. 


  Once chilled fill to your hearts content!


So my piping skills need practice but you get the general idea and I don’t do anything by half measures so I finished them off with a caramelised peal dusted with icing sugar, divine!


Wednesday, August 8, 2012

Baking and Baileys

So a couple of weeks ago I had the sudden urge bake with Baileys. I made a very successful batch of Baileys cream cheese brownies a couple of years ago but I couldn’t for the life of me find the same recipe but this one comes pretty close.

 I got the recipe from Wee Kitchen but instead of layering I marbled the cream cheese and Baileys mixture.


I also added chocolate chips to add a bit of texture to the brownie!

And because I had to buy a whole litre of Baileys since my local liquor store doesn’t believe in miniatures, I had to think of something more creative to do with the Baileys than drink it desperate housewives style. Then while on my third shot it came to me, Baileys butter cream and so the Baileys espresso cupcake was born! 


Not only was this my first attempt at making butter cream but it was also my first attempt at piping it too! I learnt the following; first don’t use a piping gun (too messy and not enough control) I’ll try a piping bag next time and second and most important I later found out that alcohol does not go well in butter cream, it stops the butter cream from hardening properly. Hey you live and learn and on the upside they tasted great! The other upside I found this cupcake carrier at the supermarket for half price, SCORE!


Tuesday, June 19, 2012

Later that night..

So I’d made my vegan pops, it was midnight, I was high on chocolate fumes and this resulted in me making another batch!

 Bored with just the usual round pops I made the up a mix with double chocolate cake and chocolate frosting. Instead of leaving the pops round I flattened them and cut out star shapes with a cookie cutter. Dipping them in chocolate was almost impossible so I resorted to drizzling them with chocolate instead, understated but delicious.  


And then I went a tad ott with my chocolate cupcakes dusted with Oreo cookie topped with Oreo truffles!


Presentation is everything!

Vegan Pops

A good friend of mine is vegan and usually when I bake she misses out so last weekends project was vegan friendly goodies. The thing I love about these pops is that there is no actual baking involved, just assembly.


The filling is an Oreo truffle and it's then coated in vegan chocolate. Believe it or not Oreos are vegan and to combine the Oreos I used Tofutti which is a dairy free cream cheese that’s tastes no different to low fat cream cheese, I swear!


Crush up the Oreos as fine or as chunky as you like. Personally I like a bit of crunch so I just put them in a zip lock bag and crushed them with a rolling pin. In terms of proportions I used about 220g of Oreos and ¾ tub of Tofutti. There is really no hard and fast rule for the proportions; as long as your mixture can be rolled into a ball without crumbling you’re good. It also helps to use the cream cheese at room tempreture, alot easier to combine. Alternatively you can use a food processor, blend until you have the texture you want and add the cream cheese straight into the food processor.


Once you’ve got all the balls made up refrigerate until they are firm. In the mean time vegan chocolate! Now this is a little tricky. After much research I found this recipe on Gentle World:

1/4 cup cacao butter (optional)
1/2 cup coconut butter
2 Tbsp. cocoa (sifted)
1/4 cup agave
1/4 tsp. vanilla extract
a pinch of sea salt


I couldn’t find cacao butter so I just substituted it for coconut butter as the website suggests and it turned out fine. The tricky bit is getting it to the consistency where you can use it. When you combine the ingredients the oils and the solids separate and the mixture is runny so to combine them you need to chill the mixture but don’t refrigerate! On my first attempt I thought I’d be a bit time efficient and refrigerate and microwave to soften, big mistake! It hardens too quickly in the fridge and then when you soften it, it burns. Instead, this is how the website suggests you do it, place the bowl of mixture in a shallow pan with water and a couple of ice cubes. Stir the mixture until it combines into a nice creamy chocolaty consistent. If it does get too hard repeat the same process but wit hot water.


Its best to coincide the finished chocolate with when the balls are hard so you can secure the sticks in the balls with the chocolate; dip the end of the stick into chocolate and push it just under half way into the balls. Give them a couple of minutes to harden and you’re ready to coat. My chocolate was slightly firmer than dipping consistency so I used a butterknife to smooth on the chocolate. This gave the truffles a slightly more rustic finish but I like it. To add an extra touch I put mini Oreos on half the batch and dusted the others with Oreo cookie crumbs.